The Process - dramatic transformation from clay to form

Peter throwing
Drying initial piece to attach neck

Creating the neck of an Orb

Wet throwing complete
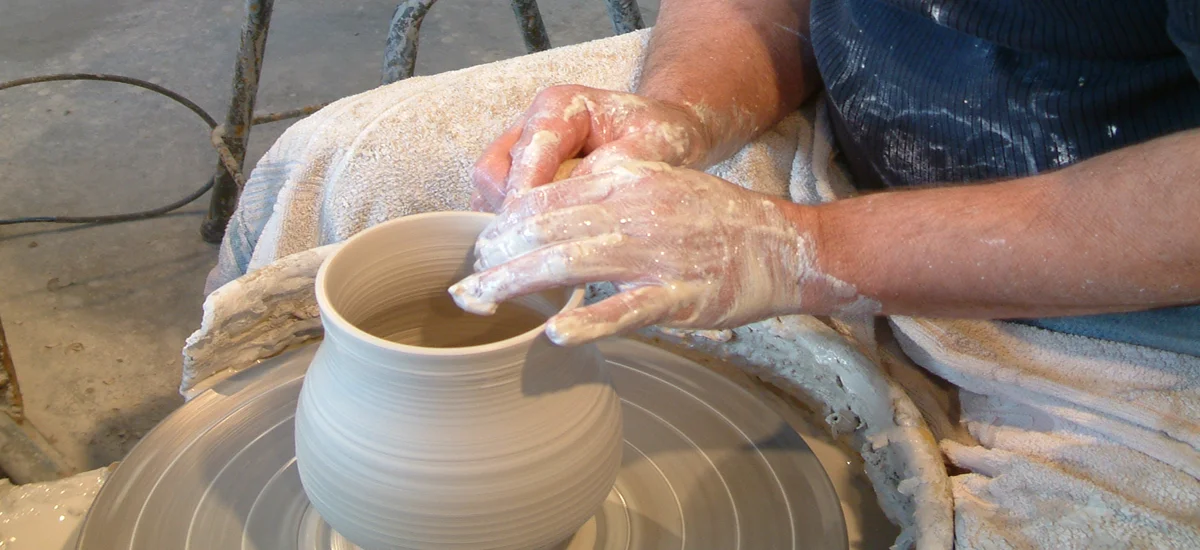
Throwing

Turning the footrings
Peter learnt to ‘throw’ pots on the pottery wheel as a teenager in the 60’s. The basic premise is to centre a lump of clay on a turning wheel, open it up and use the hands to pull the clay into the desired form. Every potter develops his or her own unique methods and Peter is renowned for his accurate throwing of fine forms from delicate and tiny to sculptural and large.
The leather hard pot is often returned to the wheel and re-centered for the final refining with tools, cutting away excess clay, adding details, foot rings etc.… Only then can handles or spouts be added to the round forms.
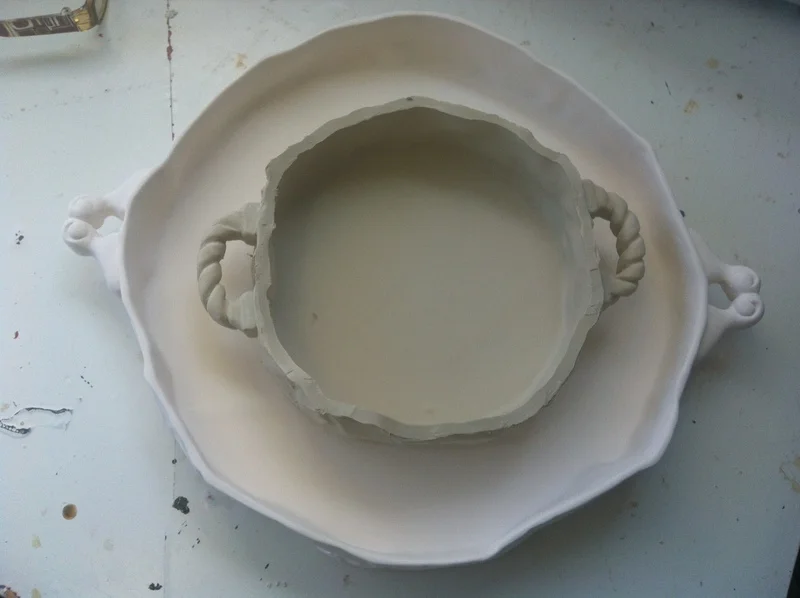
Hand building in molds.

Making the plaster master

Making the mold

Sculpting the original form

Tidying up the mold

The plate in the mold, ready to come out

Turning the plate out of the mold

Glazing a crushed paper bowl

Attaching handles for slipcasting

Slipcasting separate elements

Creating the master for a mould
Assembling slipcast elements
To make objects that are not round an original is hand sculpted and a plaster cast is taken from it. Simple open boat shaped molds are used to make the waka and kali. Extruded strips of paper clay are laid into the molds in a range of patterns and layered enough to build the strength of the piece. When they are firm they can be removed and feet or pedestals are added by hand.
Slip and pressure casting
More complex forms can also be cast in plaster, sometimes in a jigsaw of pieces that fit around the original. These molds are held together with rubber strops to allow the cavity to be filled with slip (liquid clay). When the plaster has absorbed moisture from the slip and formed a skin inside the mold the excess slip is drained. When the form has stiffened enough the plaster mold is carefully removed, revealing the piece. This technique allows different pieces to be made and joined and multiples can be taken from one mold.
Pressure casting is used when delicate forms need to be really strong, such as the ‘paper plates’. The mold is made like a sandwich, i.e. the plaster is the bread and the plate will be the filling. The slip is forced into the mold under pressure to fill the cavity more densely.

Glazed pots going into kiln for firing

Collapsing Forms Collection firing

Bowls glazed for firing
Glazing in the studio

glazing bottles before firing

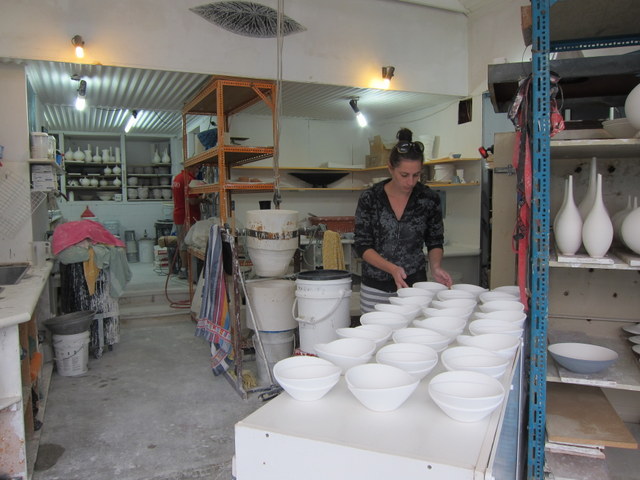
Graduate working

Slipcasting large bowl

Gimble being turned

Pot being lowered out of mould

Creating colour samples

Preparing for kiln firing

Cleaning cast glass molds
Firing
Once the clay pieces have dried out they are placed into the kiln for firing. The first firing takes the pots slowly up to a temperature of 900* C. This allows them to further dry out and to become bisque ware, which is still porous (like a terra cotta planter or brick). This means that decoration can be added to a stronger pot and, when dipped into a liquid glaze, they will absorb a layer.
The second firing is hotter and can range from 1100*C to 1250*C, depending on the type of clay and glazes being used. This firing makes the clay much stronger, no longer porous and melts the glaze into the surface, making it usable.
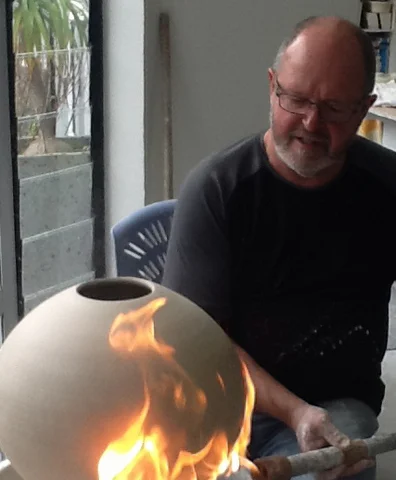
Some pots are fired a third time to add special effects to the surface of the glaze, and this is a much lower temperature of about 750*C. such as enamels, lustres or decals.

Weaving the paper clay in the plaster form

Preparing for firing

Rim being added before firing
Glazing & finishing
There are many different finishing and glazing techniques and each potter develops these according to their own aesthetic but also depending on the clay and kiln they are using.
We use computerized electric kilns that are eco friendly and offer us a flexible oxidizing atmosphere within the kiln, as opposed to a gas or wood-fired kiln which will produce a reduction atmosphere, allowing a large range of colours, textures and surface effects to be achieved. We use mainly porcelain clay but have also developed our own bone china and fritta recipes.
Peter is renowned for his expertise in developing glaze chemistry and the application of glaze, both by dipping and spraying, e.g. the red and turquoise glazes.
The Waka and Kali have a deep, glossy coloured glaze sprayed on, and a third firing develops the textural Egyptian paste layer.
Julie’s Royal ware is bone china that has a clear glaze and 22ct gold lustre is painted on and third-fired to set in place.
The crackle glazes are created by adjusting the chemical formula to change the co-efficient of expansion, (how the layer of glaze fits around the body of the clay pot and matches it’s rate of shrinkage) to give a wide range of crackle size and pattern.